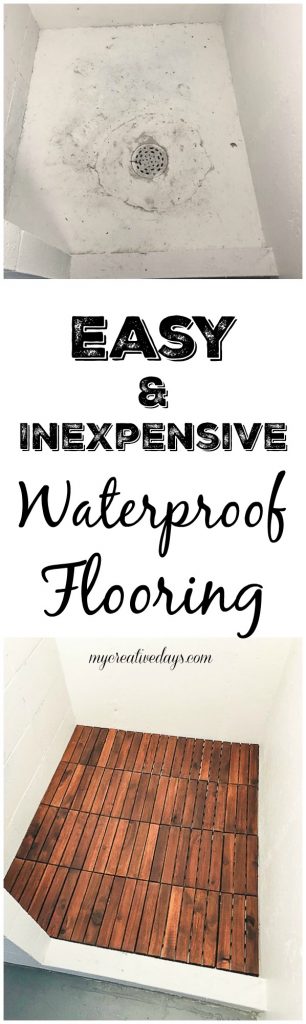
Looking for waterproof flooring? This post will show you the waterproof flooring we added to the flip house in under 20 minutes and for less than $40.
These posts are always so exciting for me to share. When we figure out a way to fix a problem we are facing and not spend a ton of money to do it, I can’t wait to share it with you.
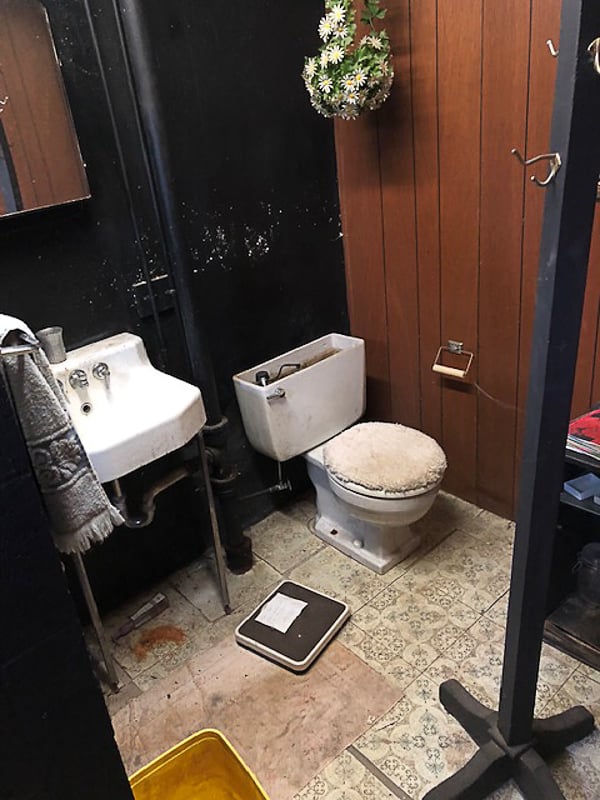
When we bought this latest flip house (see the tour of the flip on the first day we got the keys HERE), the basement bathroom was the “scariest” room in the house.
We called it the “dungeon” because there were so many cobwebs, black paint and stuff in there that we really didn’t want to spend any time in it. It had been neglected for so many years that it just wasn’t a happy space. When Matt and I were in it the first day we got the keys, we knew that with a little work, this room would probably be the biggest transformation in the entire house!
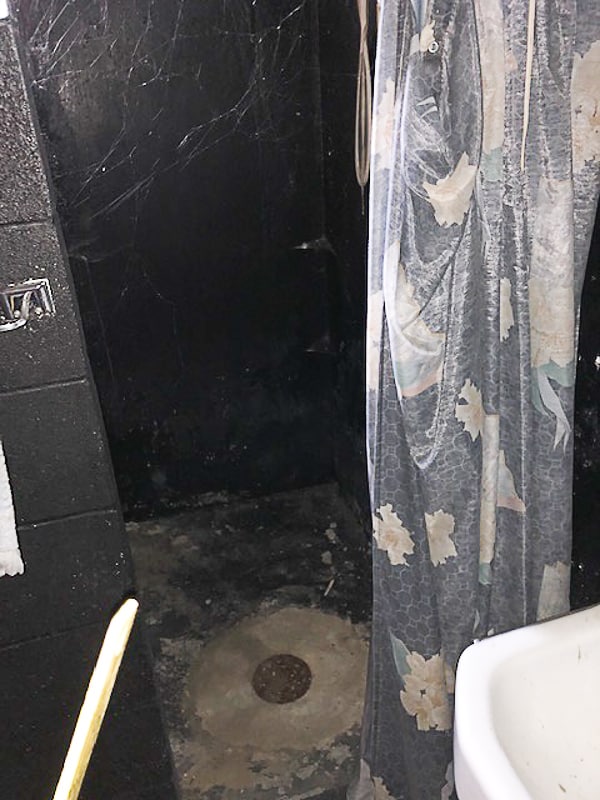
Once we got the bathroom all cleaned out, we started making plans for how we were going to make it the best room in the house. This is what the shower looked like the first day we got the house. You couldn’t even walk into it without walking through a wall of spider webs first. That was not happening for me or the kids so Matt got rid of those first thing. 🙂
After getting everything out of the bathroom and getting rid of the cobwebs, we started with paint. Paint is my favorite DIY tool because it is cheap and gives a space an instant makeover. We got to try a new tool to paint the bathroom and Matt was so hooked, he doesn’t think he will ever use a different one. I shared all about that HERE.
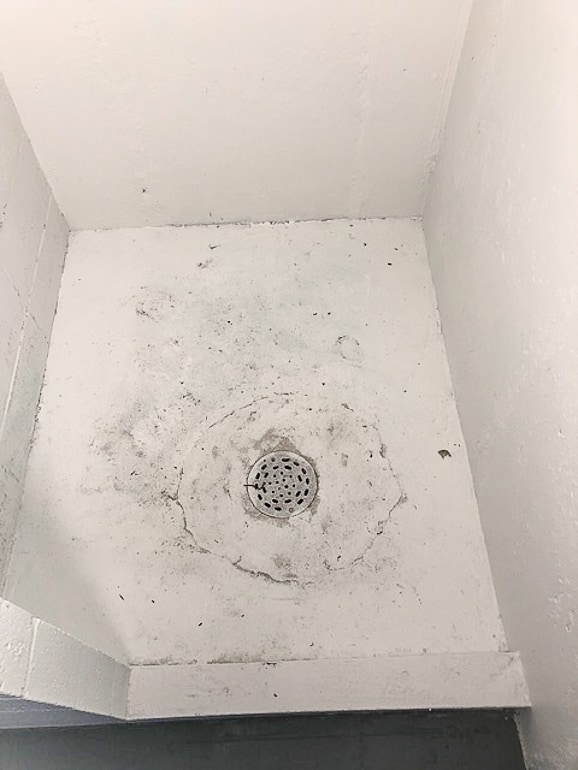
Once we had everything painted, the bathroom looks ten times better, but it still needed a lot of work.
The shower stuck out like a sore thumb to me. It is just a regular concrete, basement shower, but I wanted it to be so much more. It didn’t have to stay that way. The paint alone wasn’t doing it for me. I told Matt, we needed to come up with something for the floor of the shower that would feel better on your feet.
We had the thought in the back of our minds and then, while we were at Menards Home Improvement one day, we ran into this stack of goodness in the store.
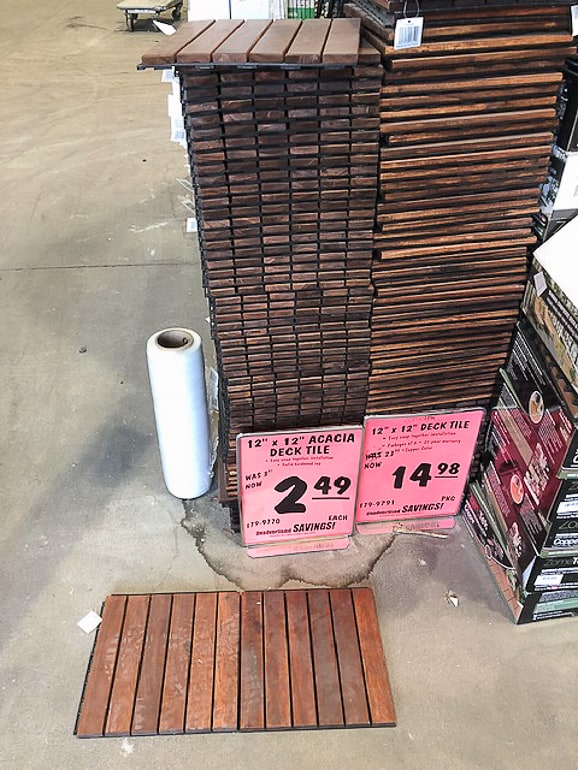
We both looked at each other and knew right away that we had found our solution. They looked easy to work with and the wood color was beautiful. It was going to make the biggest different on the floor of the shower! We couldn’t wait to get started on the project.
{Affiliate links are used in this post. You can read my disclosure HERE.}
Supplies Used For This Waterproof Flooring:
Acacia Deck Tiles
Ryobi Multi Tool (You could probably use a utility knife as well. You need something to cut the plastic under the wood.)
How To Lay Acacia Deck Tiles In A Shower:
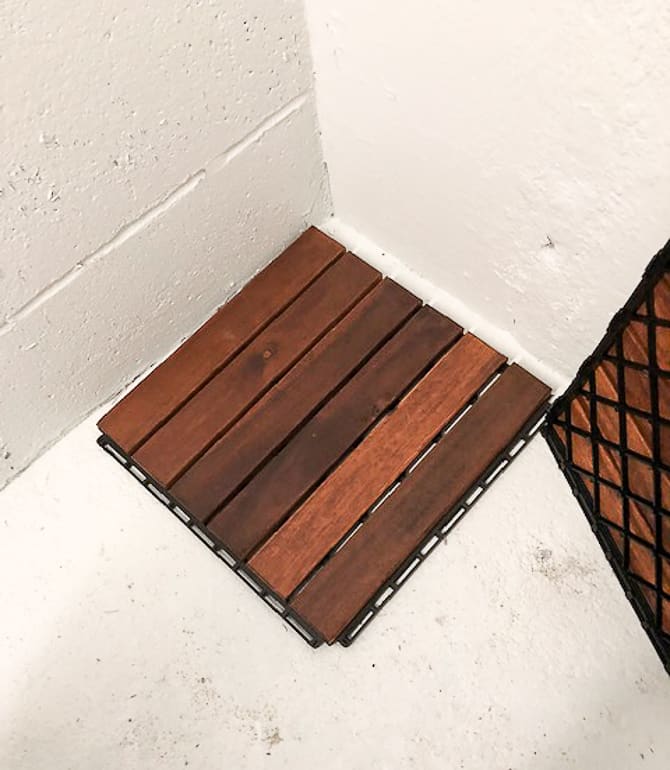
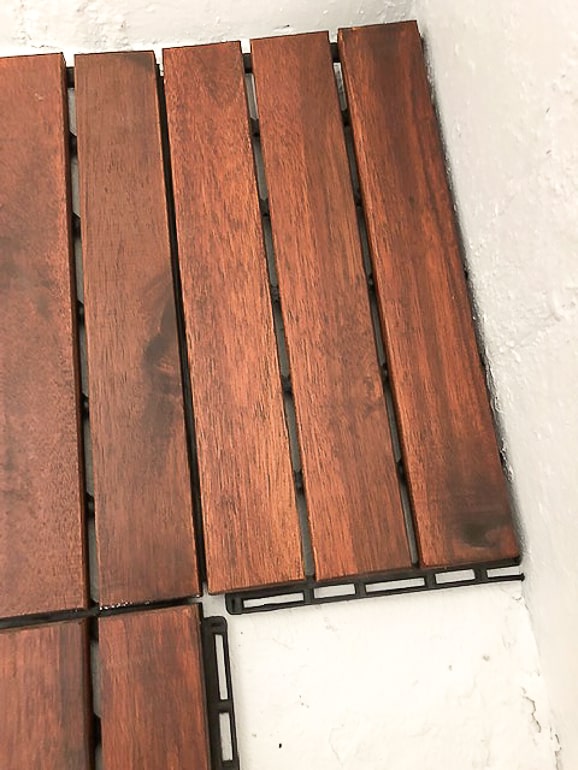
First, we started with one tile in the corner of the shower.
Then, we hooked the next tile onto the first one as shown in the photo below.
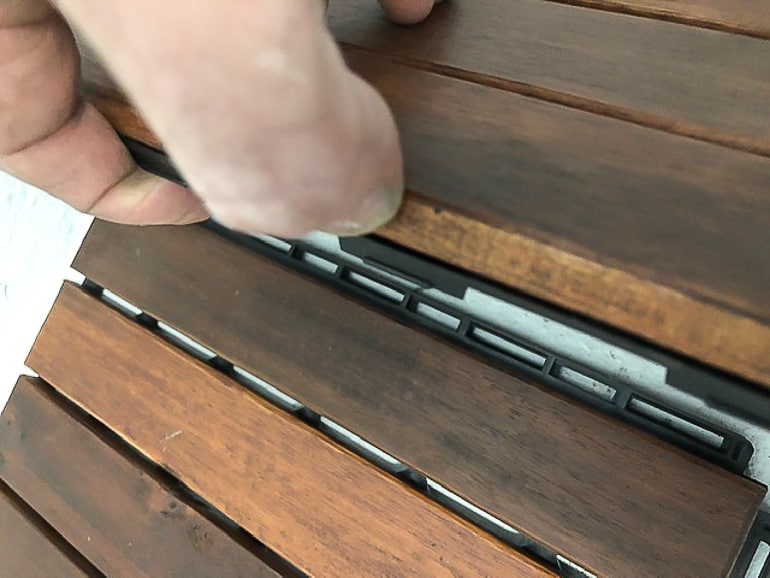
They went together so easily.
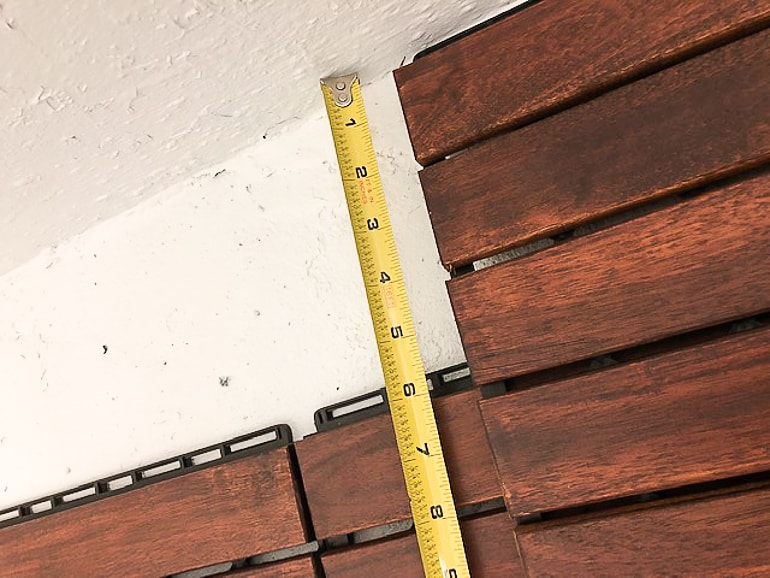
We kept putting them together until we reached a spot when a full tile wouldn’t fit so we had to cut them.
Matt measured the opening that we needed a cut tile to fit.
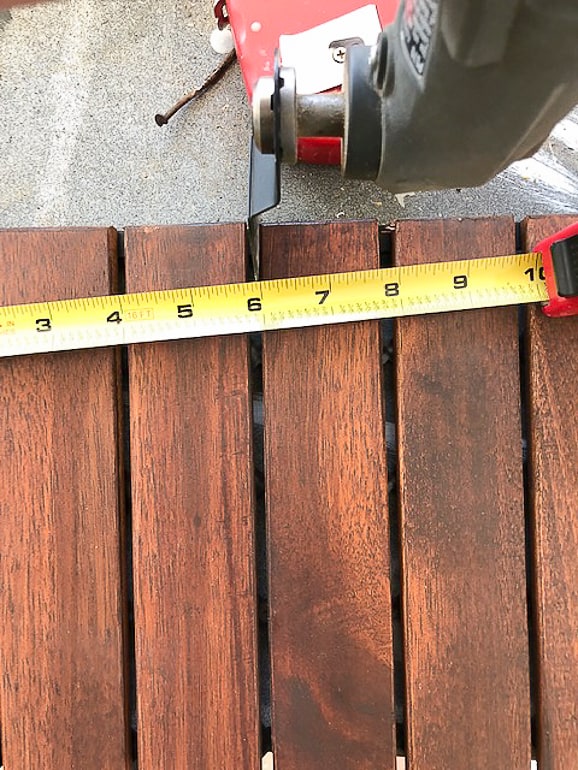
Then, he measured that same size on the tiles and used the multi-tool to cut the plastic between the wood slats. Matt said that he thought you would be able to use a utility knife if you didn’t have a multi-tool. It is a harder plastic you need to cut through so any tool with a sharp blade should work. We use the multi-tool for all kinds of things and had it there. It was perfect for this job.
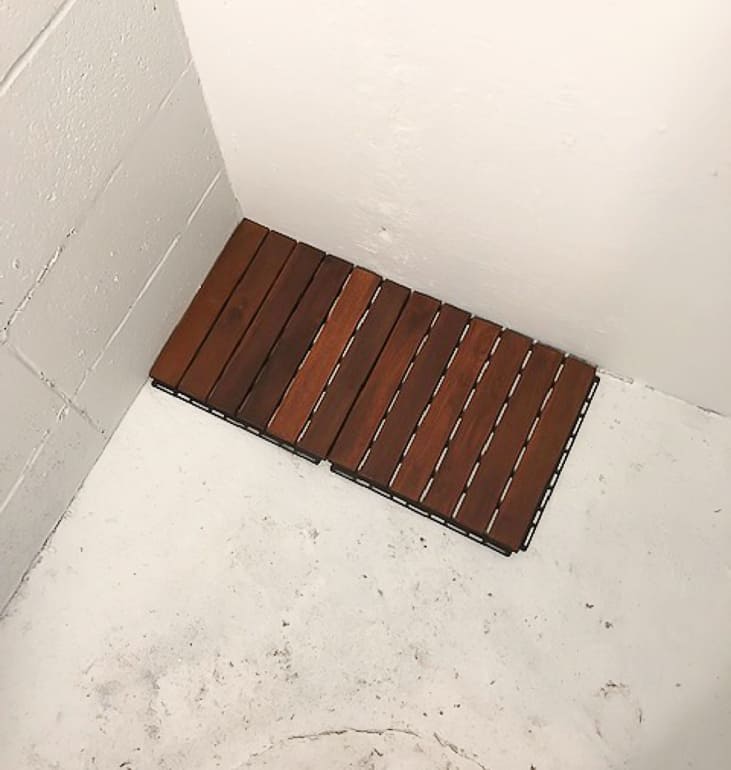
Then, Matt connected the cut piece with the regular size tiles in the shower. EASY PEASY!
There is no glue, no grout, no adhesive. You could use these tiles in so many places.
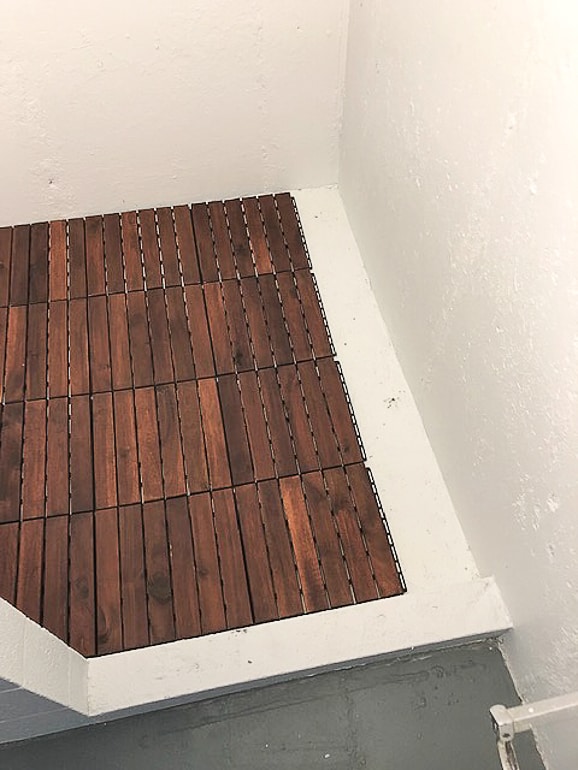
To go from this:
to this:

in under twenty minutes and for less than $40???
Sign me up!!!
This is exactly the solution we were looking for in this bathroom. A second bathroom is definitely a selling feature, but now that we have taken it from a dungeon to a pretty bathroom, it is even more of a selling feature.
I can’t wait to get the entire space done so I can reveal it and share it all here!
Stay tuned!
PIN THIS POST!
If you liked this waterproof flooring solution, you will also love these easy home ideas:
How To Paint A Bathtub Easily & Inexpensively!
How To Paint Tile The Easy Way
The Easy Way To Paint Paneling
That is absolutely fabulous!!!
Thank you! We love how it turned out!
Thank you so much!
I think it is super cool looking! Of course I worry about cleaning ….
Easy to clean!
How is it easy to clean? I did the same thing in my shower but underneath is disgusting after 3 months and sooo manual to clean even with spraying contractor grade mold cleaner every week….
This was a basement shower that wasn’t going to be used very often at all. If was a flip house that we sold. She said she was not going to use it but loved that she had the option if her son came to visit and wanted to take a shower down there.
What an awesome transformation. We might do that instead of refinish the porcelain base. Thank you Lindsey
Your welcome! We love it!
How do you clean the scum that must accumulate under the tile flooring? Do you periodically lift it up and clean under it?
Yep. It comes right up. I don’t see this bathroom being used a ton for showering so it won’t be that big of a deal. The planks can come apart and I would power wash them outside.
Was your shower floor slanted towards the center or was it level? If it was slanted did this make a difference with the tiles?
It was slanted some but not enough to make a difference.