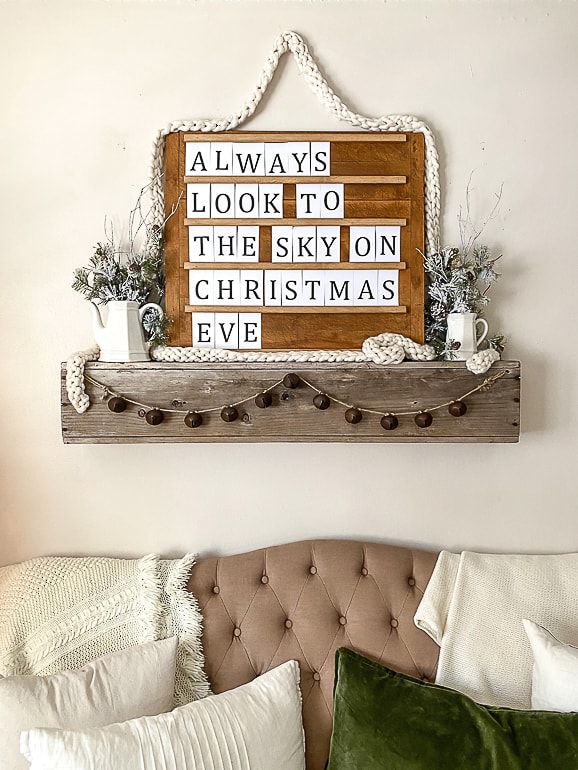
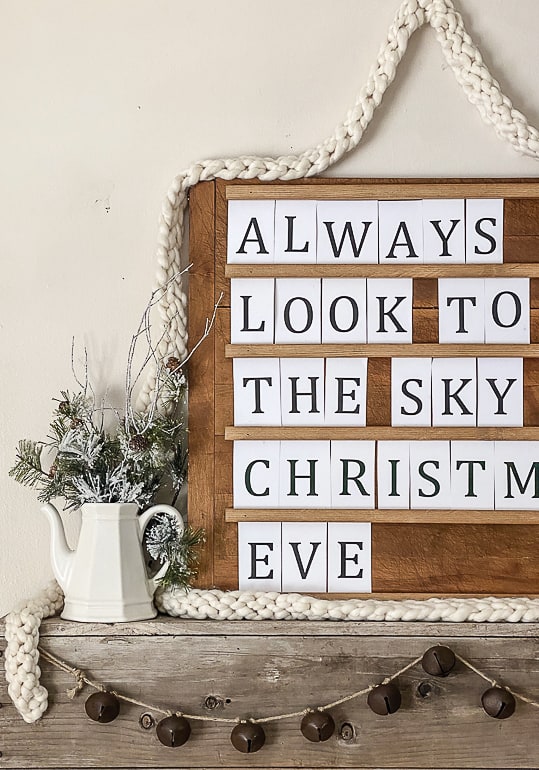
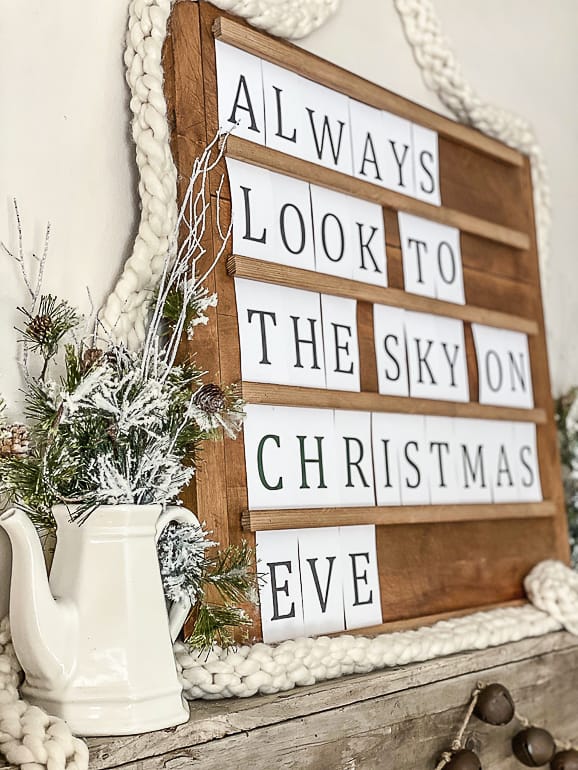
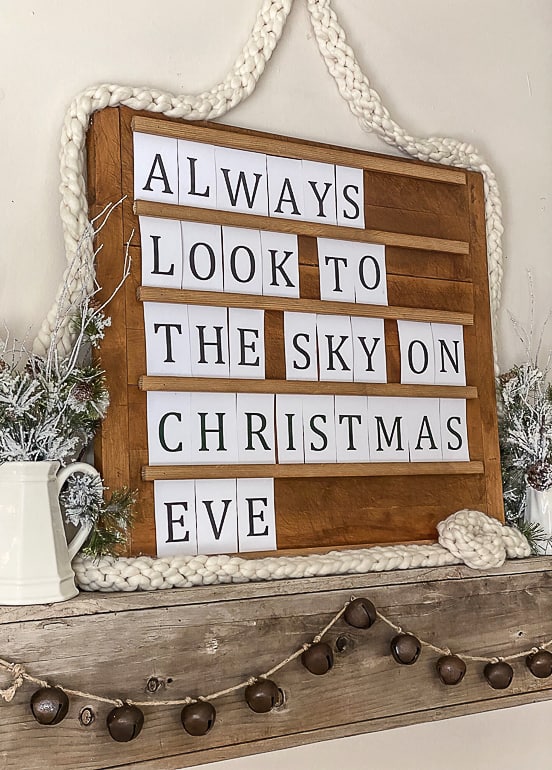
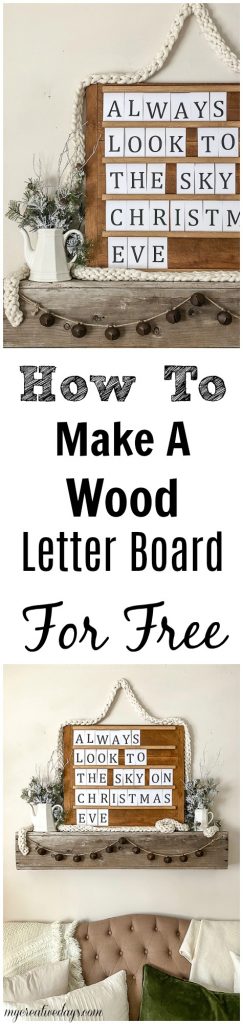
Wood letter boards are so much fun. I use my Emmerie Lane wood letter board all the time, but for this project idea, it was too small. I wanted a BIG wood letter board to go over our faux mantel in our living room, but I didn’t want to spend a lot of money on it. This DIY letterboard is so much better than anything I could have bought!
{Affiliate links are used in this post. Click on any of the underlined links to find the products I am talking about. You can read my disclosure HERE.}
Supplies Used To Make This Wood Letter Board
Note: **These supplies and measurements will change depending on the size of letter board you want to make. I had a size in mind and we made it happen with what we had on hand. You can buy all of the supplies if you don’t have anything on hand. It will still be an inexpensive project that you will use all year round!
- Wood board for the base (our sign was an old butcher cutting board we had in the garage. It measures 28″ long by 25″ wide. Use any board you have.)
- 1/2″ board strips (Matt cut down a 1×6 we had in the garage to 1/2″ strips measuring 24″ long)
- Restor-A-Finish in “Dark Walnut” (you can use any stain or paint you have on hand)
- Tools Matt used:
- Router
- Nail Gun
- Sander (to make all the wood smooth)
- Miter Saw (to cut the 1×6 board down to 24″ size)
- Table Saw (to cut the 24″ pieces down to 1/2″ strips)
How To Put It Together
I needed something large to fit above the faux mantel so Matt and I went hunting in our garage to see what we had to make it happen. (TIP: Always pick up good boards when you find them cheap at Restore and yard sales. They are so nice to have on hand when a project idea comes up).

We had a butcher block cutting board in the garage that measured 28″ wide and 25″ tall. Perfect for the letter board. It needed a good sanding to clean it up, but it was a good solid base to start with.
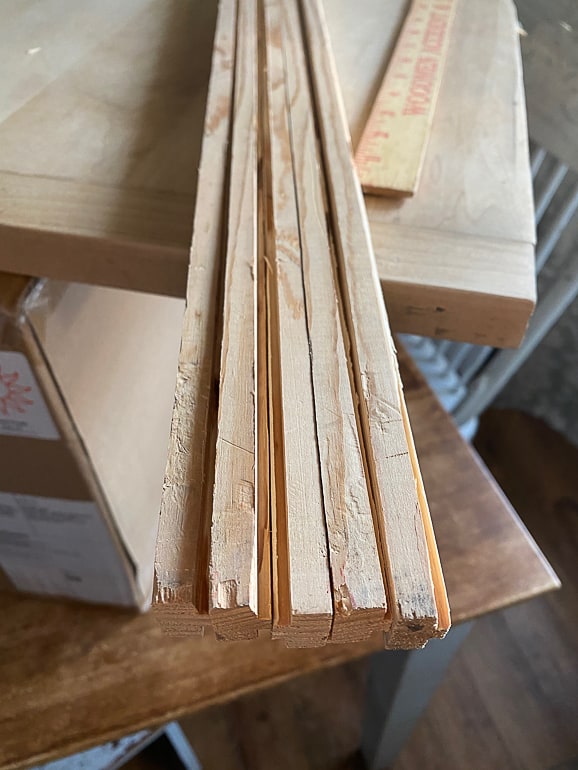
Once we had the base, I could measure what I needed for the ledges where the letters would sit. I wanted the ledges of the letter board to be 1″ on the front and come across the butcher block 24″ across. We didn’t have those exact boards in our garage, so Matt had to make them from a 1×6 we did have. He used the miter saw to cut the 1×6 down to 24″ pieces. I was able to get six “ledges”.
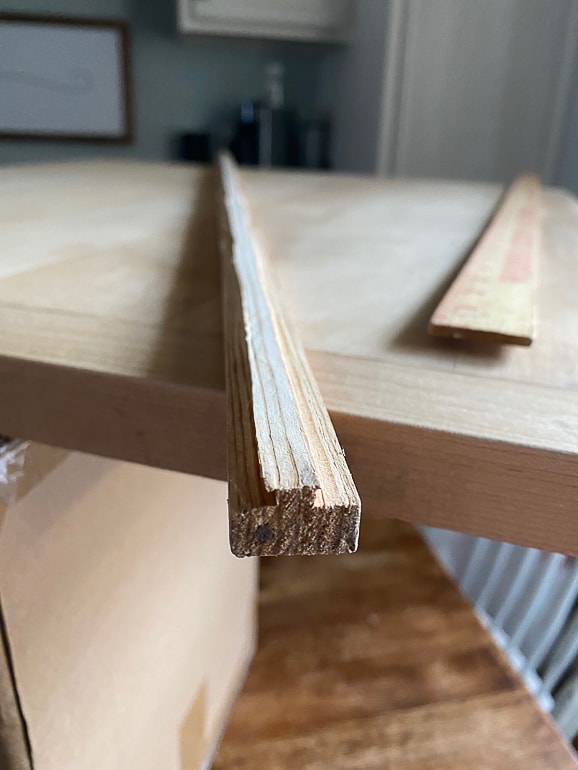
Once the 1×6 was cut into 24″ pieces, Matt used the table saw to cut them down to 1/2″ strips. Then, he used the router for the back of the 1/2″ strips. This enabled the ledges to be flush on the butcher block, but have a little opening on each end for the letters to slide in.
Matt is a genius! I was planning on just setting the letters on the ledges, but he thought it through and knew the paper letters would be falling off all the time so we needed to secure them somehow on the letter board. Routing out the back of the strips made it so I could slide the letters between the ledges, so they were held in place!

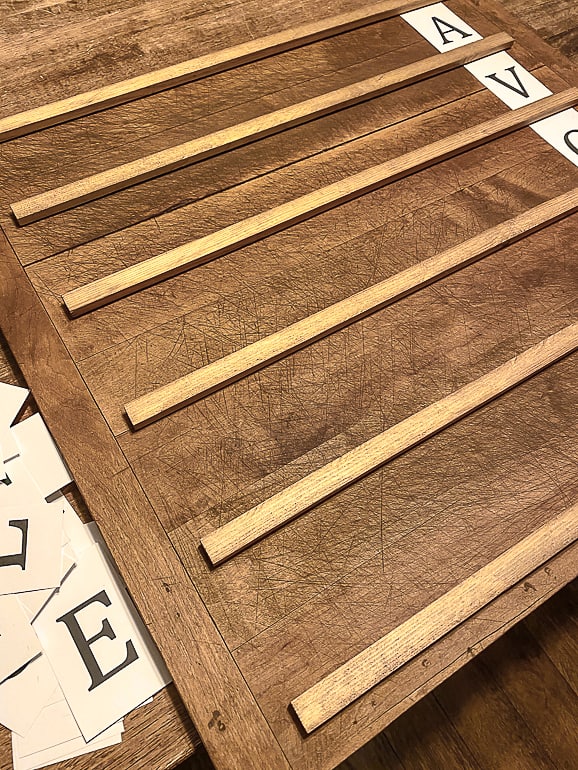
Once all the ledges were cut and routered, Matt sanded them all so there were no splinters. Then, he applied Restor-A-Finish “Dark Walnut” to the butcher block and ledges. You can use any stain or paint you have on hand.
After it dried, it was time to put the board together.
It’s getting dark so early and it is already so cold, so working from the dining room table in bad lighting will have to do to get the job done. 😊
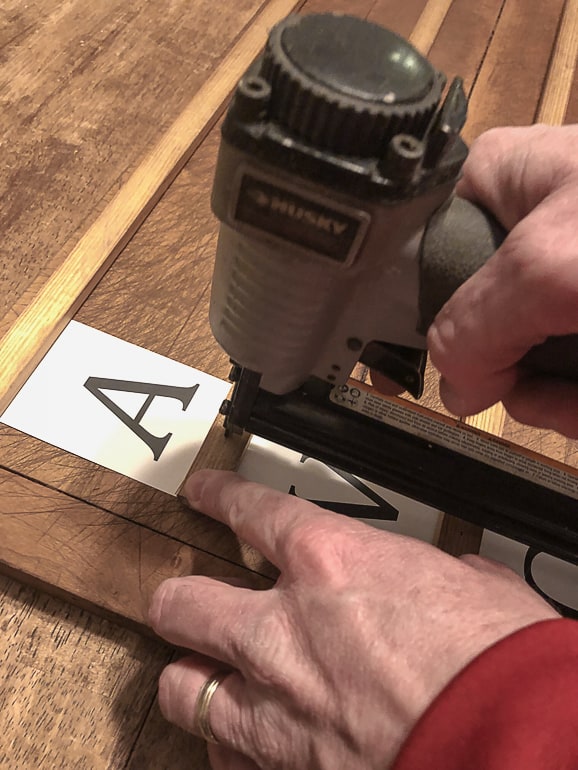
Matt used the nail gun to attach the ledges to the butcher block.
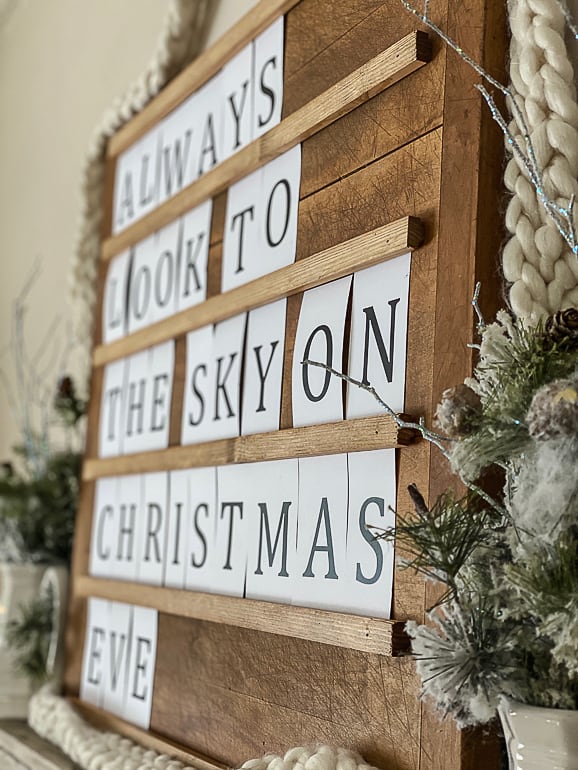
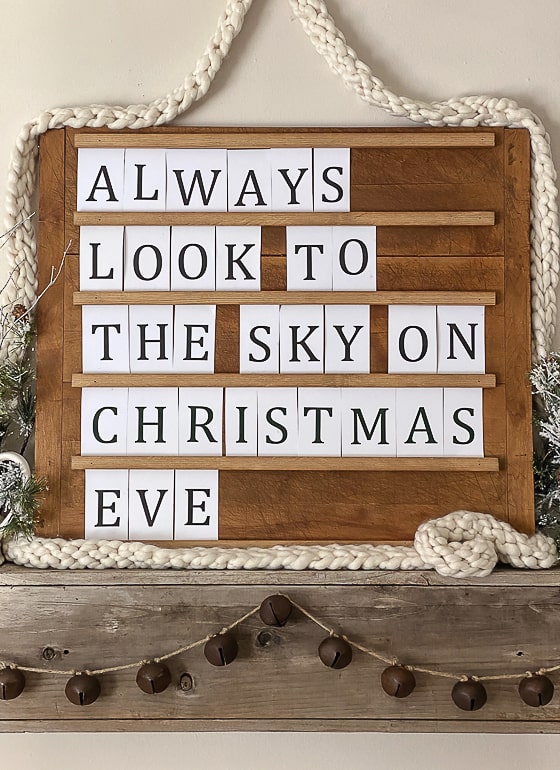
Then, I printed letters on card stock. They were FREE! You can also get the flexible portable sign letters HERE and adjust the measurements of your sign to fit them.
I am in love!!!
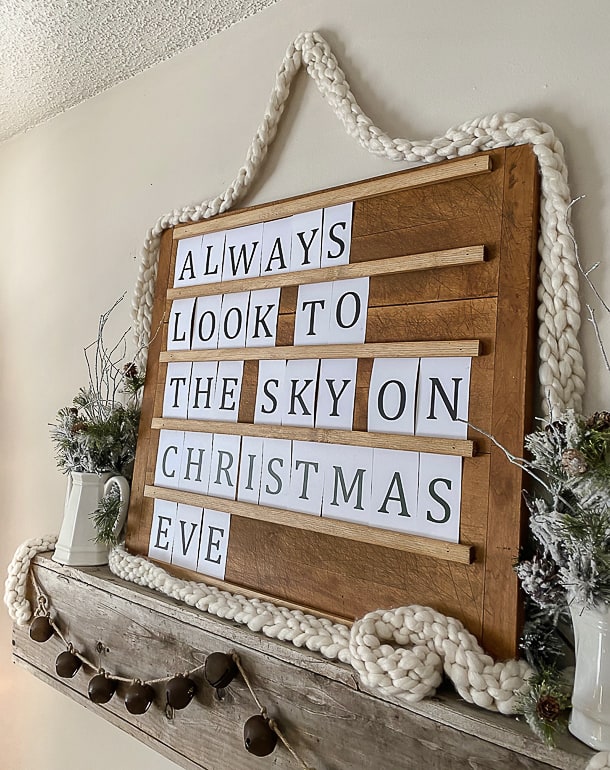
Our kids are growing up so fast and Santa doesn’t bring the magic to the season any longer. The magic comes from all of us and I always want our kids to always look to the sky on Christmas Eve and embrace the spirit of Christmas that is still so present.
The Christmas season has changed for us because of the age of our kids, but it is still so much fun. I am learning new ways to make the season just as magical.
This wood letter board can be used all year round and in so many different spaces. It would be fun in an office or a family room.
What would your letter board say during the holidays?
PIN THIS POST!
If you liked this DIY wood letter board project, you will also love these tutorials:
How To Make A Faux Mantel Tutorial
Repurposed Chairs Become Wall Decor In Entry
Architectural Salvage For The Entry
Thank you this was amazing! And I have found So much easier to make than I thought!
Your welcome!
I love the rope garland you have hanging above the sign. Did you make it? if you did do you have a tutorial on how to make it?
It’s one of my favorite things. I bought it a few years ago.
Here are some similar ones: {aff} https://rstyle.me/+tYSZV1bZespJfB_pZf2DGQ
https://rstyle.me/+Ho66B6vm7KdM2jNkSlSVEw